3.3 KiB
| sidebar_position |
|---|
| 1 |
import Tabs from '@theme/Tabs'; import TabItem from '@theme/TabItem';
Modular Avatar
Modular Avatar is a suite of non-destructive tools for modularizing your avatars, and for distributing avatar components. With Modular Avatar, adding a new outfit or gimmick to your avatar is as easy as drag-and-drop!
Modular Avatar's features are packaged as individual components, which can be added as needed. You can opt-in to just the features you want to use. It can automatically merge outfits onto your avatar, build an animator out of multiple components, and much more.
Installation
The recommended way to install Modular Avatar is using ALCOM. Installation using the VRChat Creator Companion is also supported.
If you are using ALCOM to install Modular Avatar, follow these steps:
- Open "Packages" and select "ADD REPOSITORY".
- Enter the following values under "Enter information about the repository" and click "ADD REPOSITORY":
https://vpm.nadena.dev/vpm.json
- Confirm the following details are displayed, then click "Add VPM Repository":
- Repository Name:
bd_ - URL: The URL you entered.
- Repository Name:
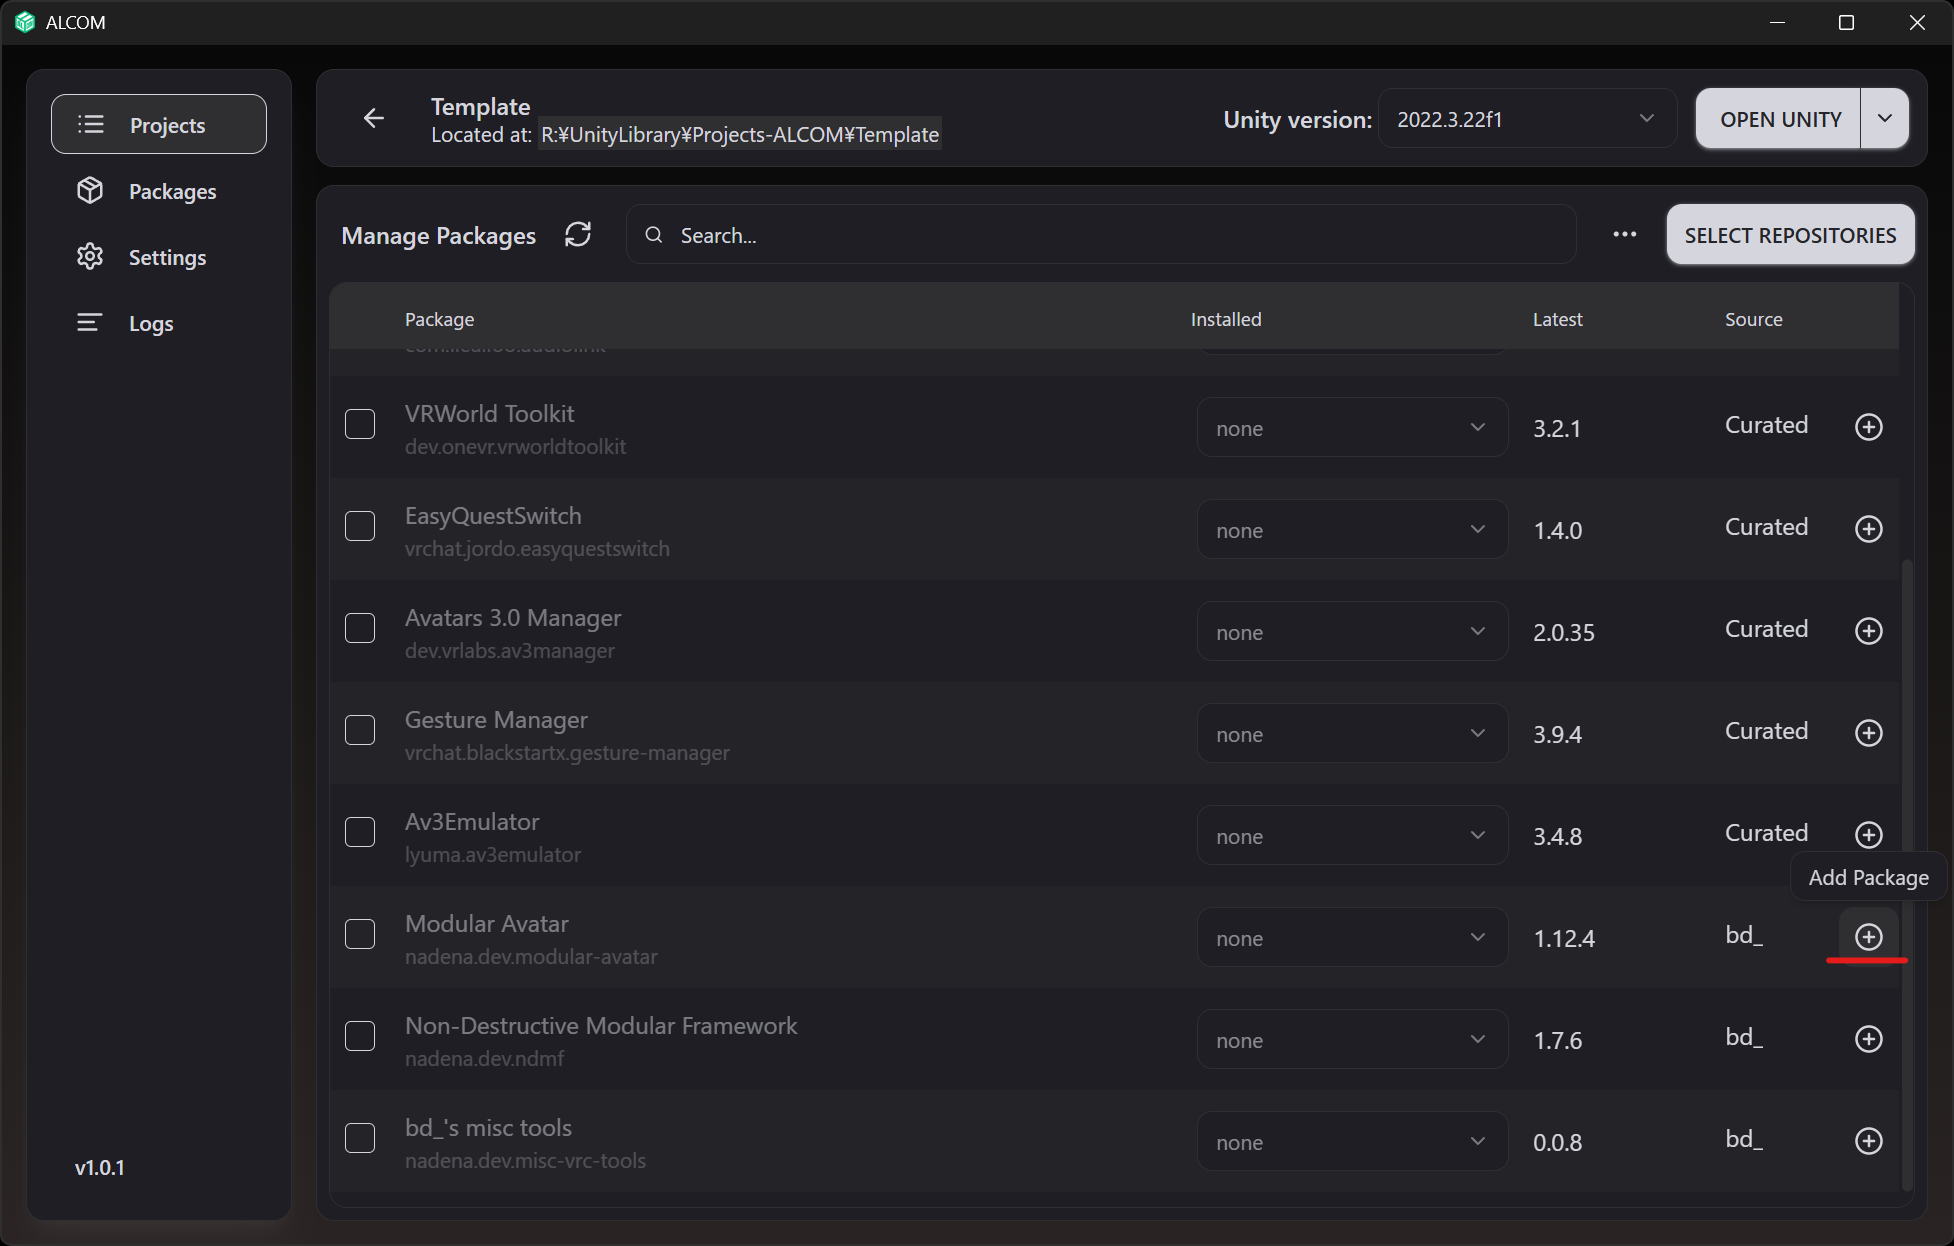
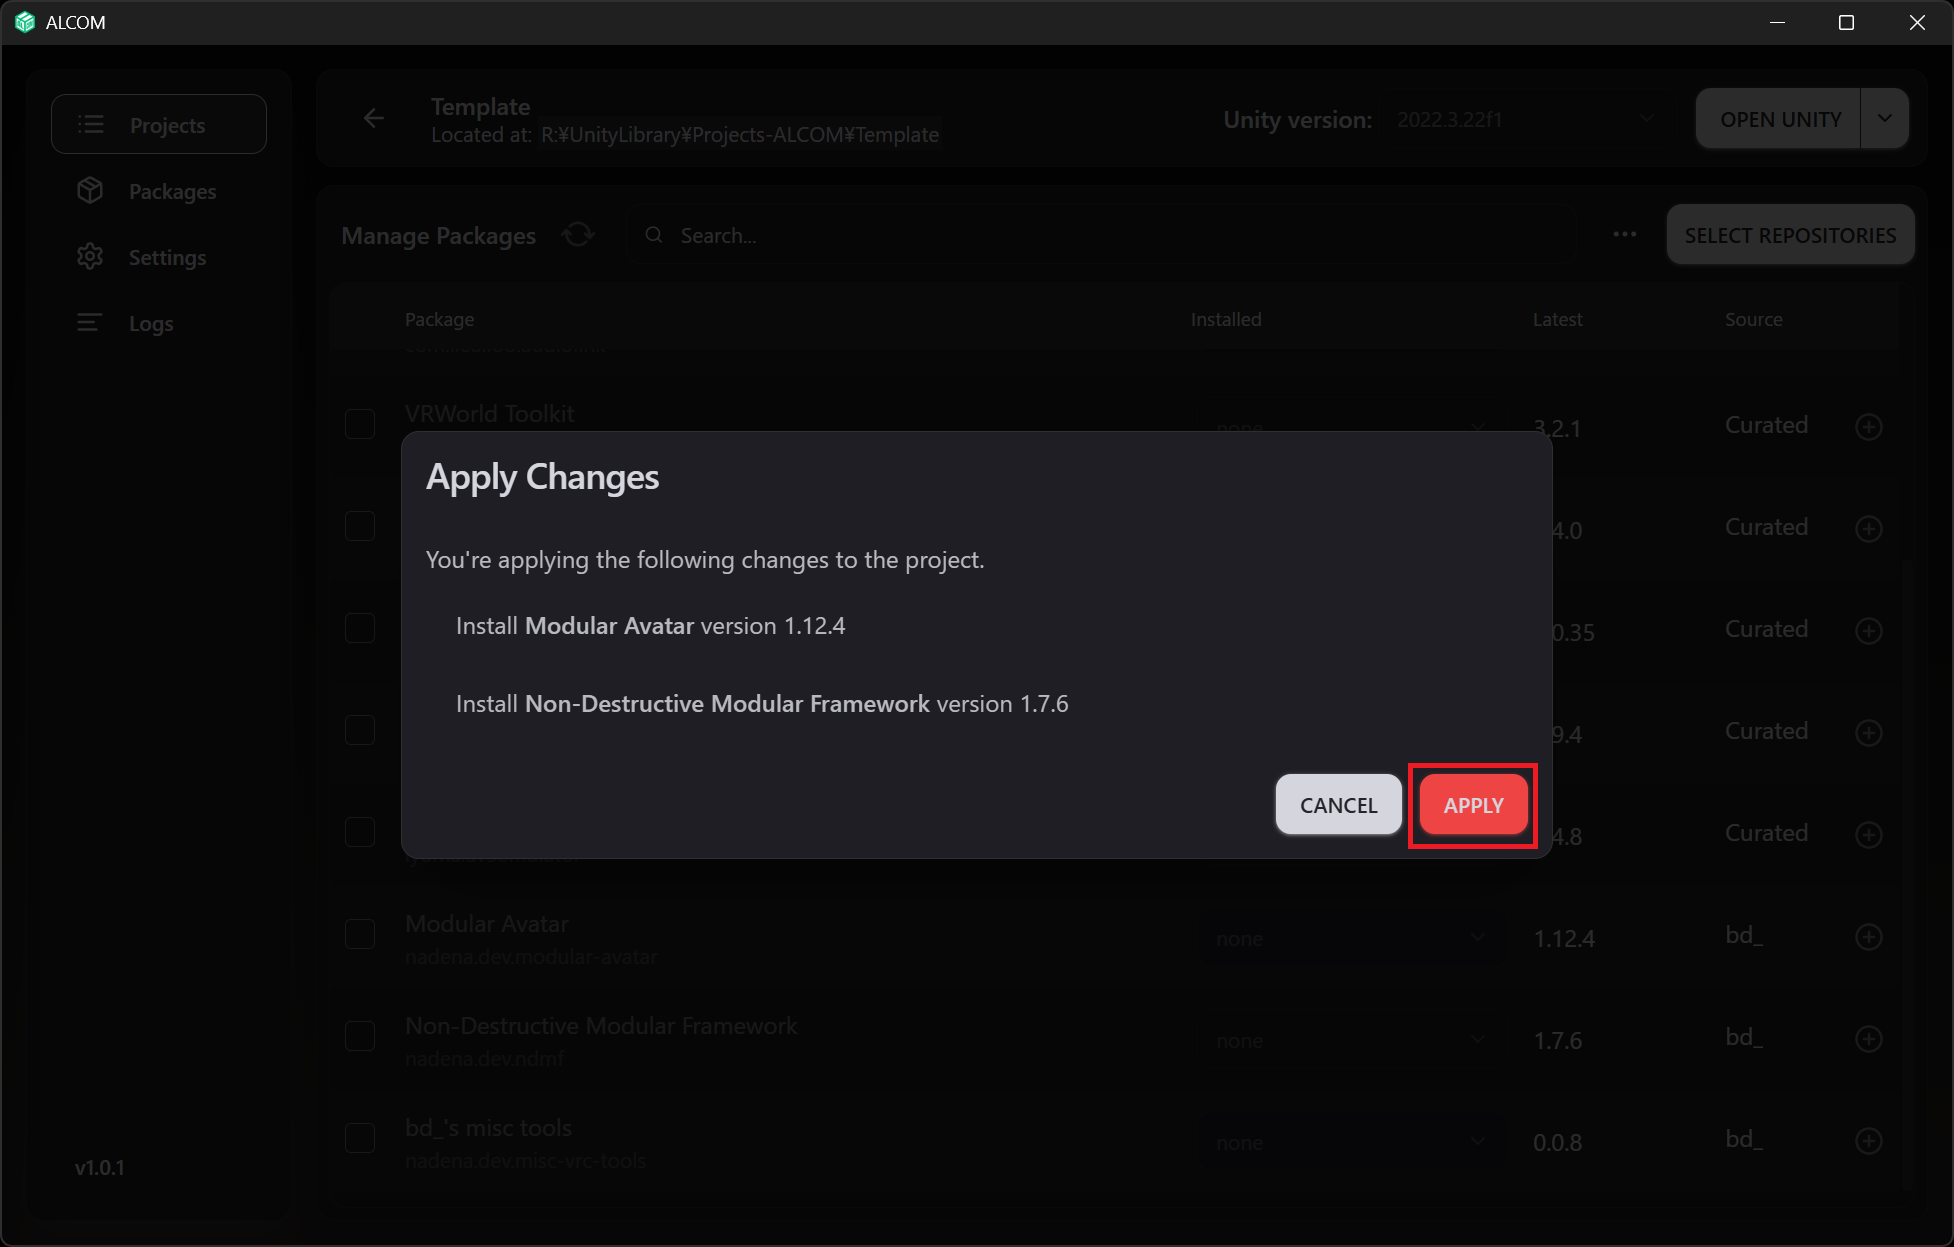
Afterward, open "Manage Project" for your project, click the + next to Modular Avatar, and then click APPLY.
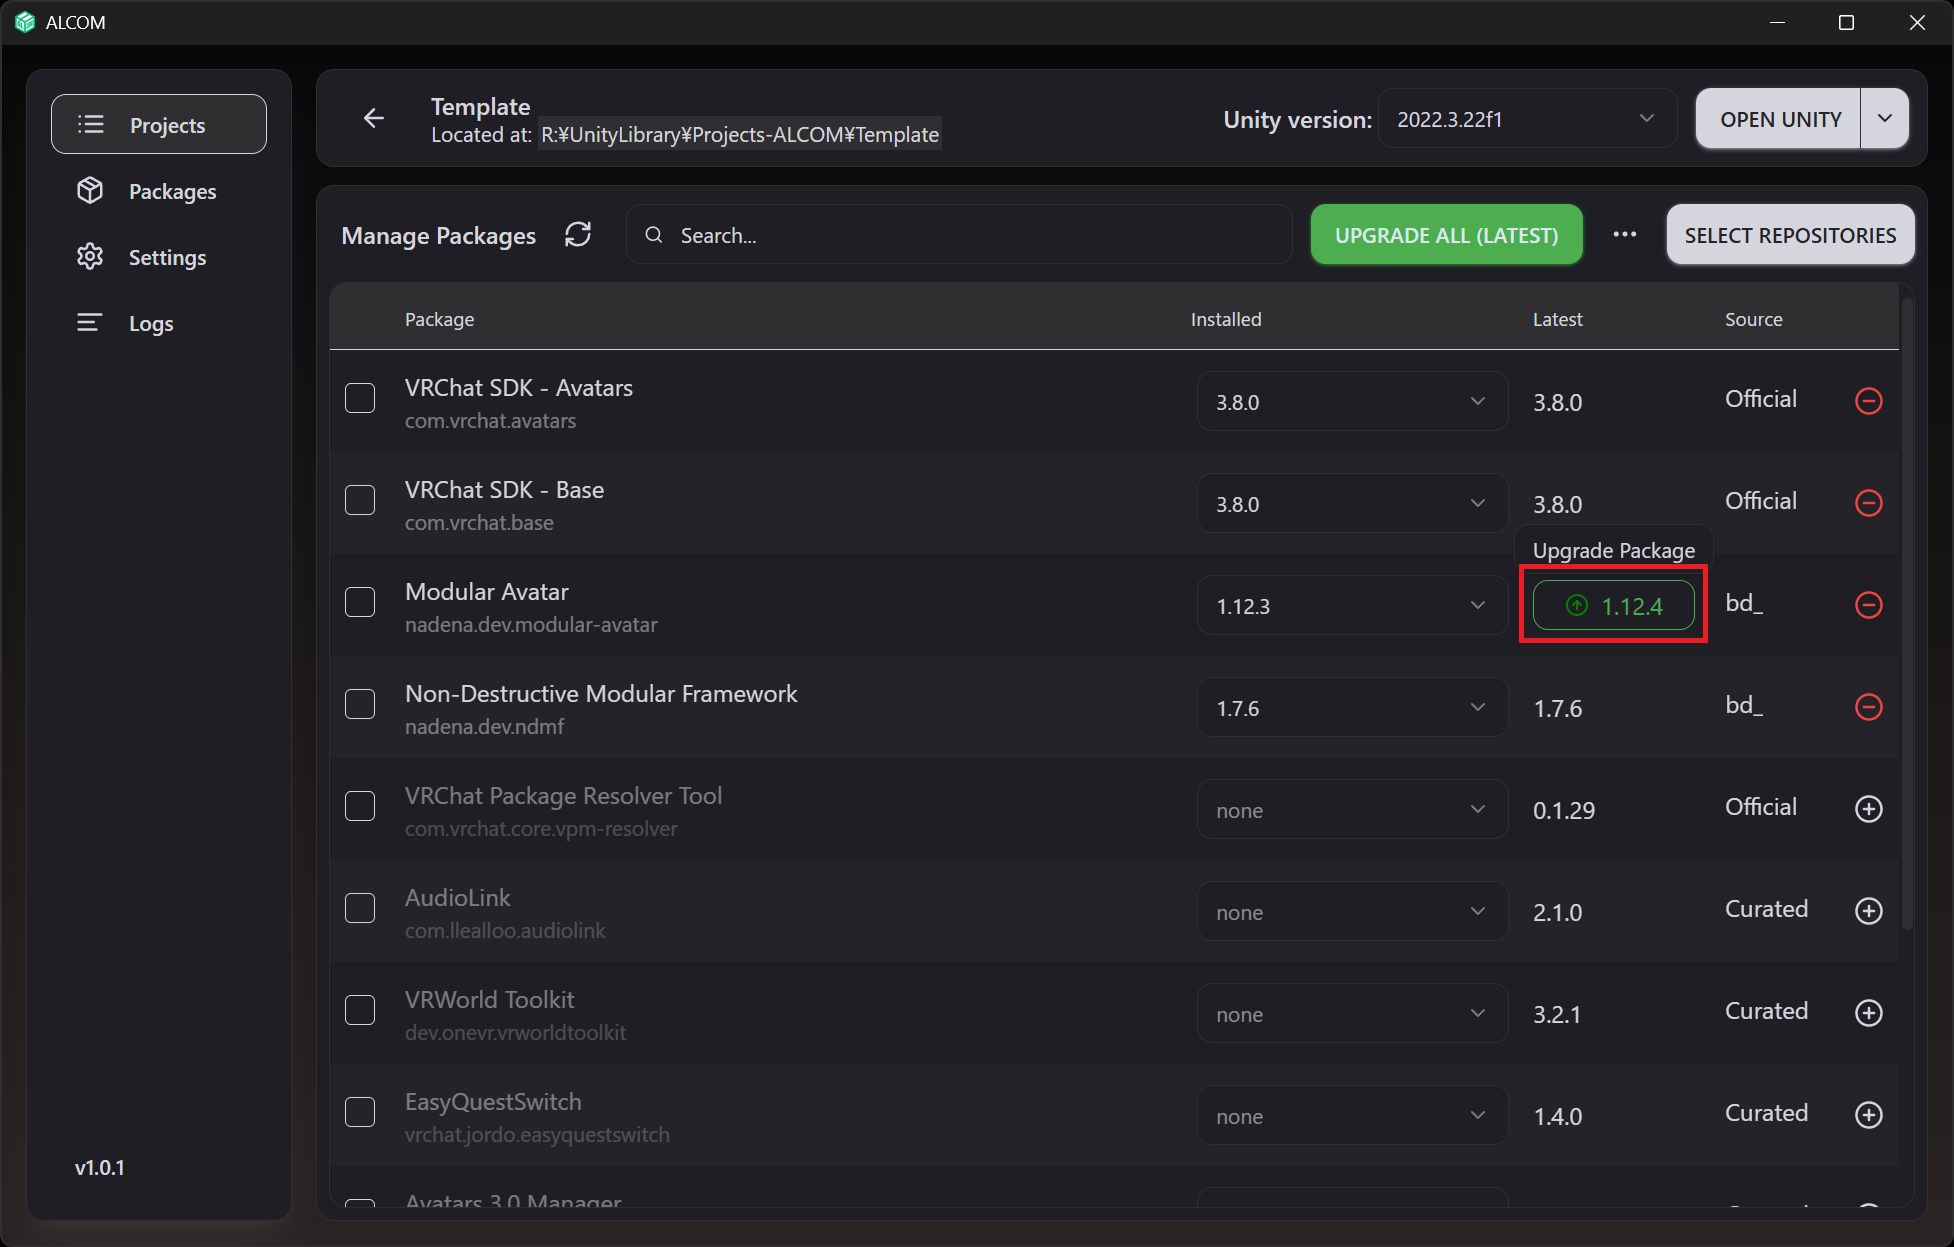
To update to the latest version, click the area with the version number and green arrow, then click APPLY.
If you are using the VRChat Creator Companion, click here:
Then, go to "manage project" for your project, and click the + next to Modular Avatar.
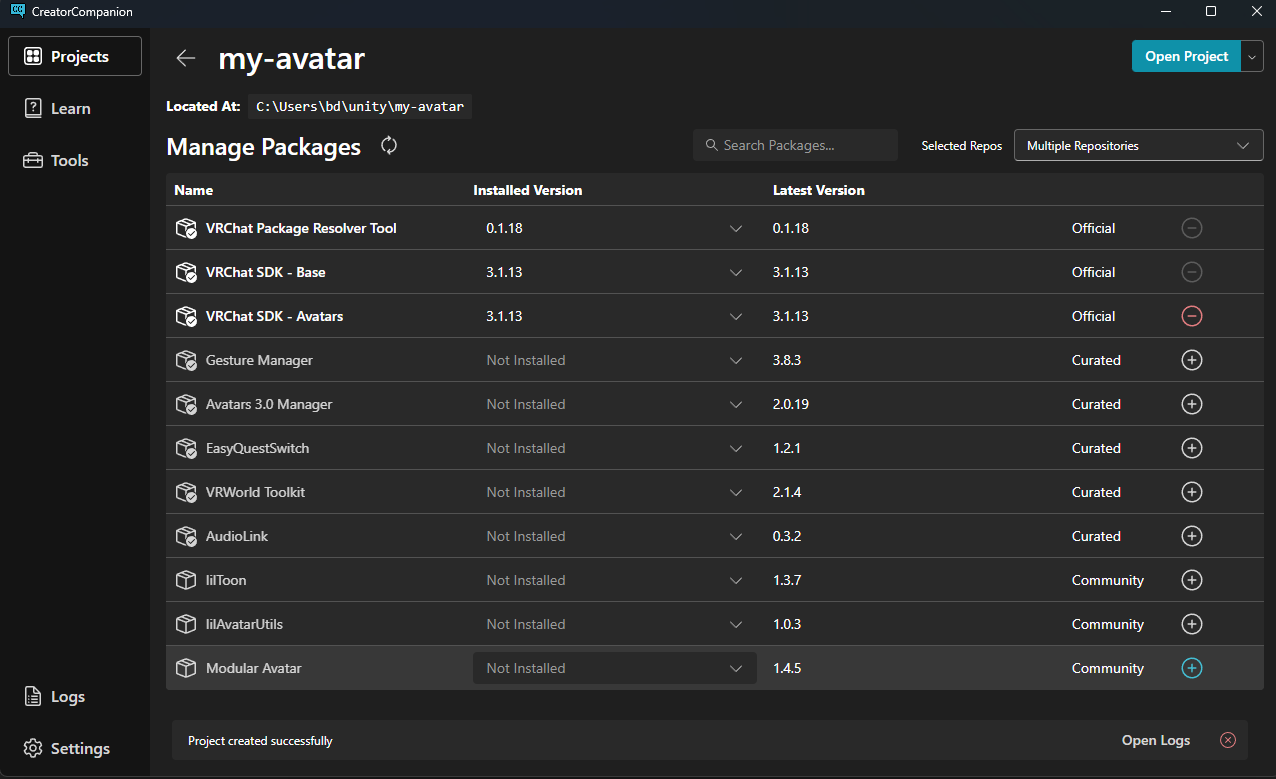
To update to the latest version, just click the green arrow in the "Latest Version" column.
Prerelease versions
:::warning
Due to bugs in VCC dependency resolution, please use ALCOM to install prerelease versions of Modular Avatar.
:::
To make prerelease versions available in ALCOM:
- Open "Packages" and select "ADD REPOSITORY".
- Enter the following value under "Enter informatino about the repository" and click "ADD REPOSITORY":
https://vpm.nadena.dev/vpm-prerelease.json - Confirm the following details are displayed, then click "Add VPM Repository":
- Repository Name:
bd_ (prereleases) - URL: The URL you entered.
- Repository Name:
Then, in your ALCOM Settings window, enable Show pre-release packages.

The documentation for the prerelease branch can be found here.
Prerelease versions may contain bugs, and/or may have compatibility breaks as development progresses. Please leave feedback and bug reports at the github issues page.
What to read next
Once you've installed MA, check out one of the tutorials below: